Ed 1
Lesson One
This page will help those of you who have purchased the 
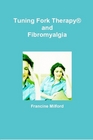
Tuning Fork Therapy® Level one book.
This is how I explain the difference in frequencies, tuning fork sizes and tuning forks in general.
1-Begin by setting out the tuning forks in your set
Set out the forks in front of you from left to right as they arrived to you in their box.
Lesson One-Step Two
For this lesson, it is best to have TWO of the same fork frequency but in two different sets.
For this lesson, I use the 256 C tuning fork form the basic kit and the 256 C tuning fork from the premium set. I can then show students the difference in tone and duration using the two forks.
I let the student first activate the one tuning fork and become familiar with the tone and length of the sound. Then, I let the student activate the second tuning fork and notice the difference in the quality, tone and duration.
Remember, one is NOT better than the other. They both have the same healing properties, only you find situations that will call for one over the other.
For children, pets, and very ill seniors-I use the tuning forks from the basic set. This causes less dicomfort for the very ill and the very sensitive.
Lesson One-Step Three
Another reason that I like the 8pc beginner tuning fork set is that it has a little notch on the handles that the other sets do not have. The notch helps beginners to identify where the correct placement of their fingers should be on the tuning fork.
When you look at the tuning forks in your basic set, you see (and feel) the peak before the dropped curve of the tuning fork. This is where you should place your thumb on one side of the tuning fork and your index finger on the opposite side of the tuning fork.
If you grab your tuning fork too high up, you will not get the tone, pitch or sound endurance that you need. If you place your fingers too far down the tuning fork you ran the risk of dropping it, or it flying out of your hands.
For more information on tuning forks, consider becoming a Tuning Fork Therapy(R) certified and registered practitioner by clicking the link below:
Lesson One-Step One
To begin,
Set out the tuning forks in front of you just as they arrived to you in their box.
You will notice that the 256 C is on the left followed by the D, E, F, G, A, B and 512 C.
Notice how much taller the 256 C fork is from the rest in the set.
Also notice that as you go down in size in the tuning fork, you are also going up in frequency. So that when you look at the tallest fork in the set (the 256-C), you will also see that the smallest tuning fork in the set is the (512-C). So, the smaller the tuning fork-the higher the frequency (or you could say the faster it vibrates).
An unweighted OM tuning fork is very large, much larger than the 256 C, because it vibrates at a much lower/slower frequnecy. An angel tuning fork is quite small and it vibrates to more than 4,000 Hz.
2-Compare Tuning Forks
Remember-One tuning fork is NOT better than another. They ALL having healing properties.
3-How to Hold your Tuning Fork
Yes, there is a right way and a wrong way to hold your tuning fork
This is another good reason for having and using the beginner tuning fork set. This set comes with a raised notch on the handle. This is where you will hold your tuning fork while activating it.